
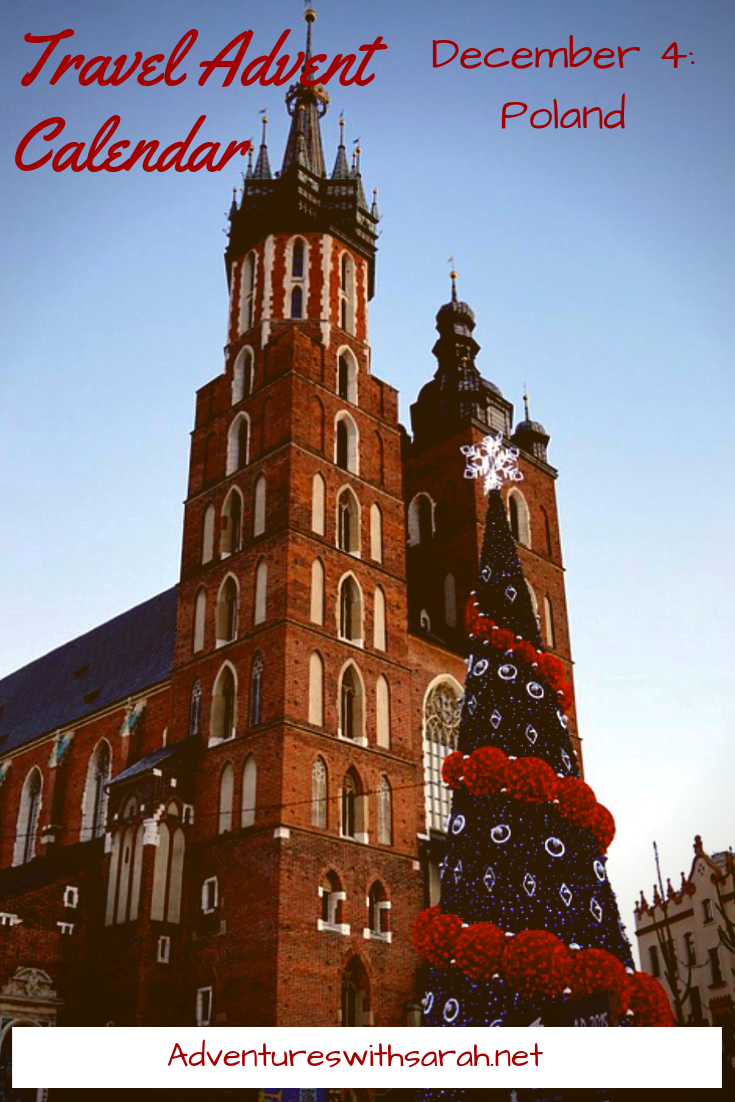
Our 4th day of the Advent Calendar takes us to the farthest north east of Europe, to a cold country with warm people, Poland. I have a special place in my heart for Poland. As a student, I traveled to Poland to visit Krakow. While there, I was fortunate to stay with a friend, an exchange student and his family. While it was the early 90’s and Poland was far from prosperous, the family was incredibly welcoming and generous with both their time and hospitality. To me, Poland is the land of being constantly fed and looked after with kindness and warmth.

The Christmas season in Poland is centered on that warmth and hospitality, especially as it relates to food. The main event is Christmas Eve, which they call Wigilia, or vigil. Christmas Eve is celebrated with a huge meal, traditionally made up of 12 dishes symbolizing the months. Beet soup, pierogis, cabbage rolls….sigh. I love Polish food!
Before dinner is served, the Christmas tree is decorated with glass balls and handmade ornaments. Poland is famous for the production of high quality glass ornaments which are sold world-wide. While the glass ones are beautiful, the traditional handmade ornaments are even lovelier and have remarkable variety.
The weeks of Advent in Poland are spent getting the house ready and preparing for Wigilia. Making ornaments for the tree is a fun part of the preparation, made at home or at Advent festivals. Most of the ornaments are made of simple materials found around the house, like paper or straw.
This brings me to your Advent assignment of the day. Your mission, should you choose to accept it, is to make a paper ornament. You can make something simple, like a snowflake cut from copy paper, or something more elaborate.
The most typical handmade ornament in Poland is a paper star and I’ve given it a try. This is a totally doable project, even if you don’t feel particularly talented at crafts. It takes simple materials, just paper, glue, scissors, needle and thread. Beads or sequins will make it easier, if you have them.
Polish Paper Star Ornament
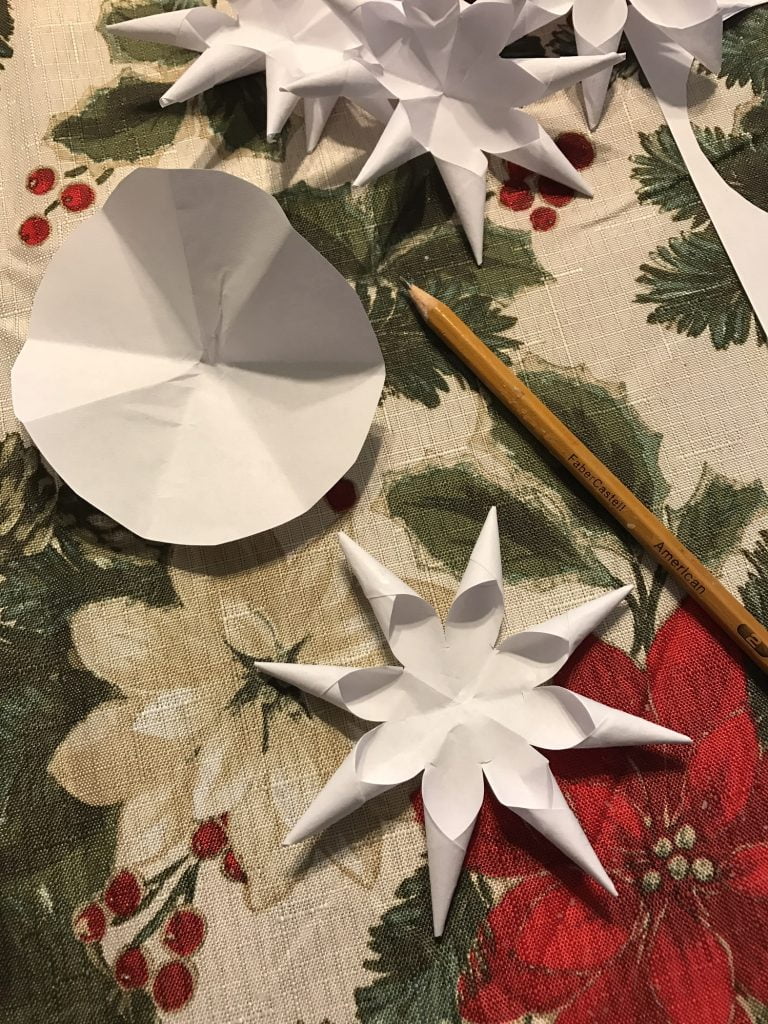

Fold a sheet of paper in quarters. Using a glass or mug, trace a circle, preferably 4″ or more in diameter. Cut through all layers, making four paper circles.
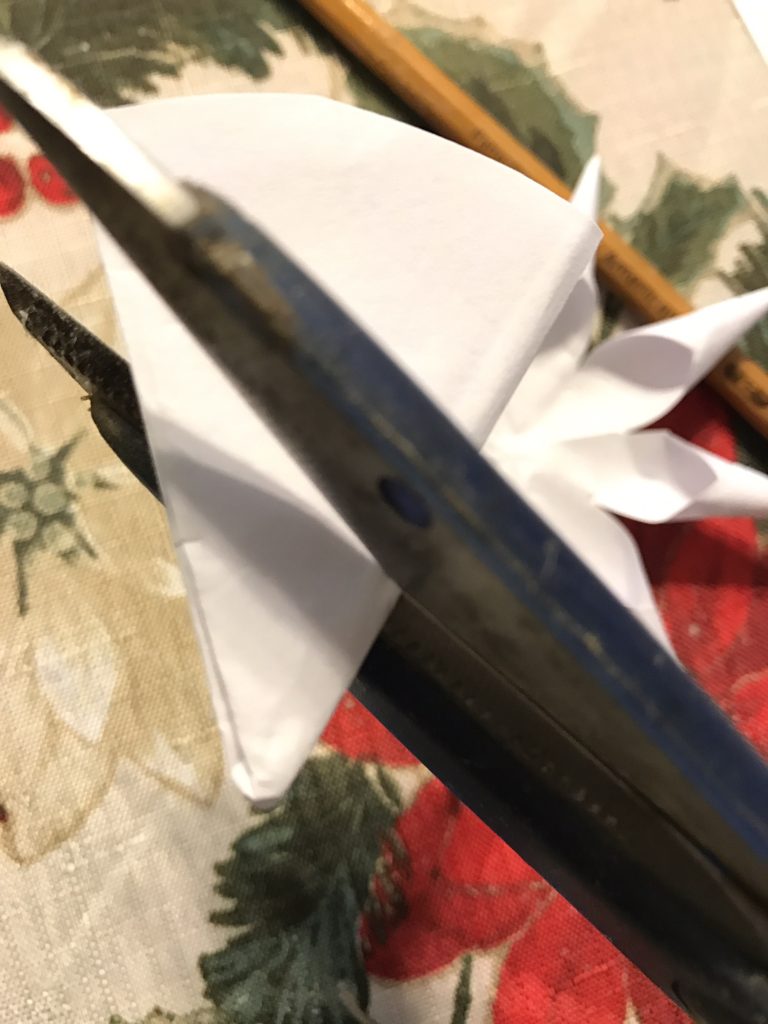
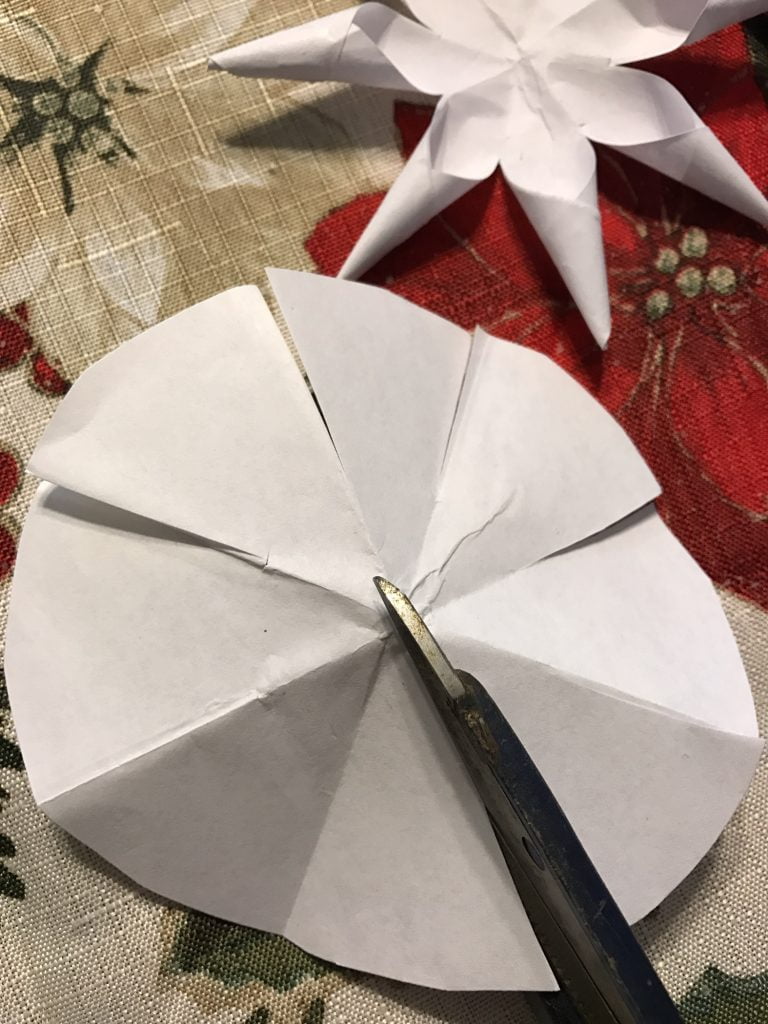
Fold a circle in half, half again, then half again. Using your scissors, make a tiny cut about a 1/2″ from the point on either side, just to mark it.
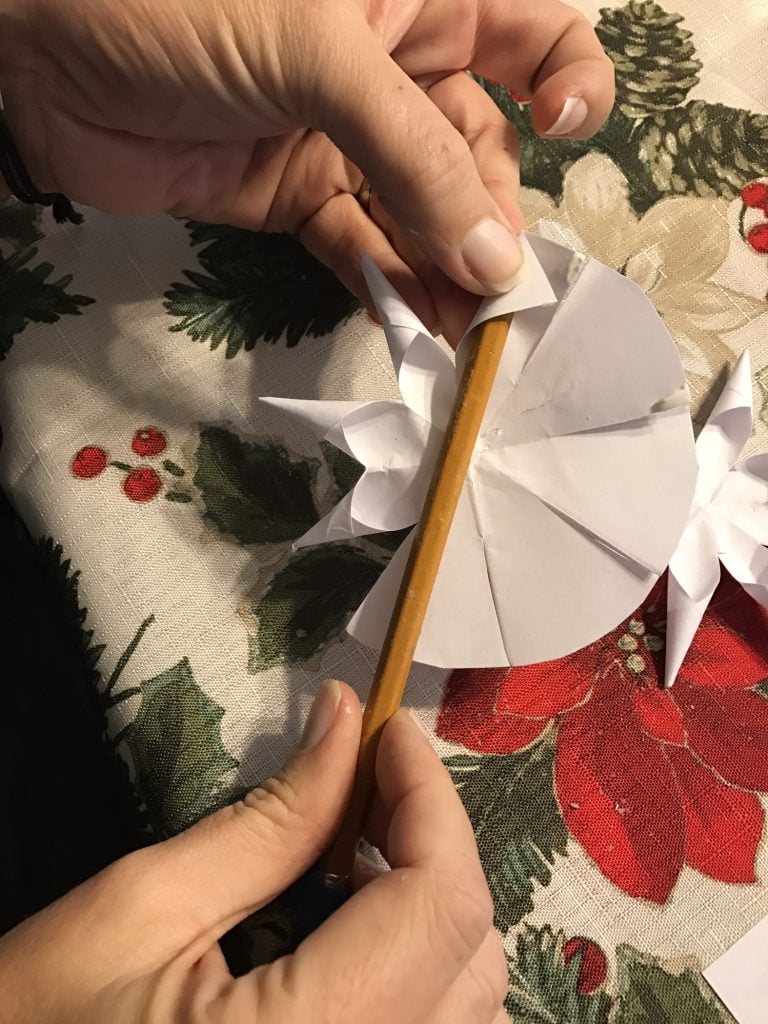
Open the circle and cut on the folds down to the small cut mark. Now you will work each wedge of paper into a point.
Put a dab of glue on the edge of a wedge. Lay a sharp pencil in the center of the wedge and use your thumb to tuck the unglued side around the pencil tip. Wrap the glued edge around the pencil and press well, sealing the seam with the glue. It should make a nice point.
Continue around the circle until all wedges have been worked into a point. Now you’ve got a star! If this has been enough work for you, stop here. Put a loop of thread through the top, grab a glass of wine, hang your ornament on your tree and feel very proud of yourself!
If you’re ready to keep going, make 7 more stars. Yep. That’s a lot of stars. But stick with me. It’s worth it.
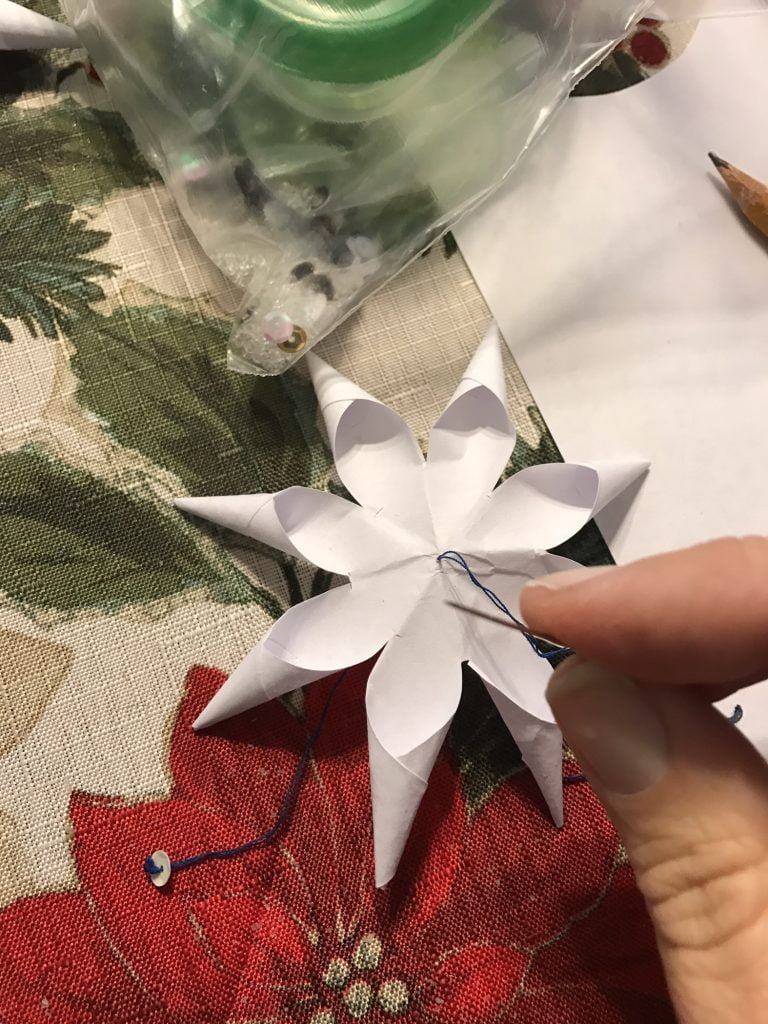
Once you’ve got 8 or more stars completed, thread a needle with strong quilting thread or thin yarn. Make a thick knot on the end.
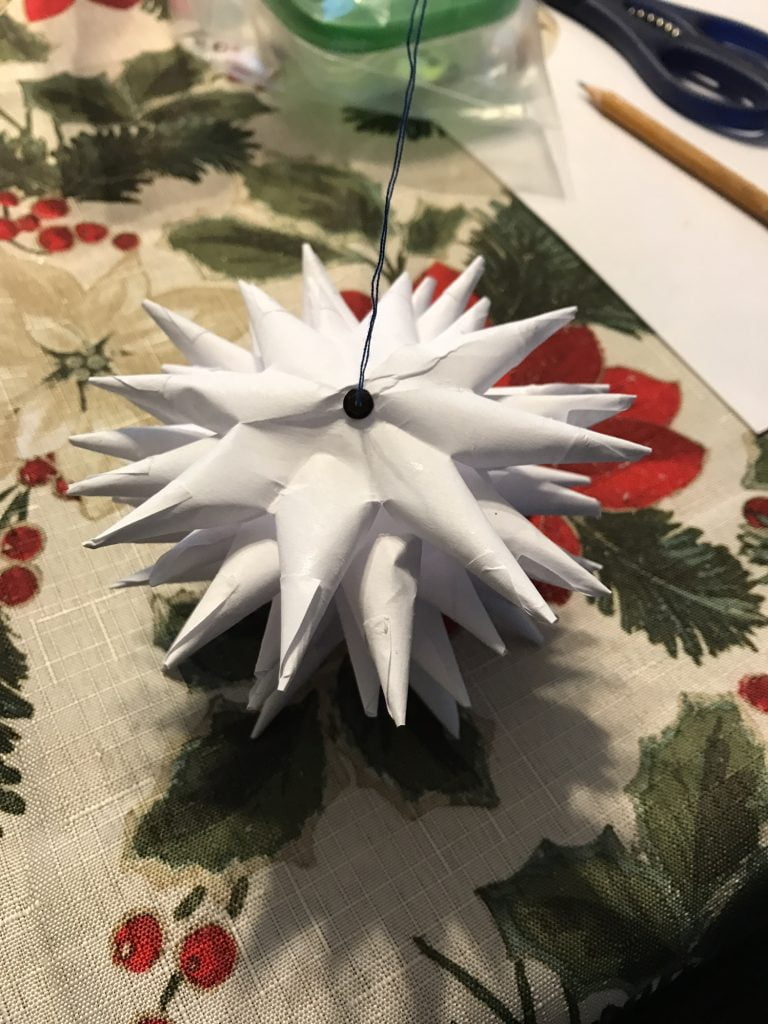
String all stars through the center on the thread. If you have a bead or sequin, thread it on the top and push it down to the center, gathering all stars together, then tie off to hold it firmly in place.
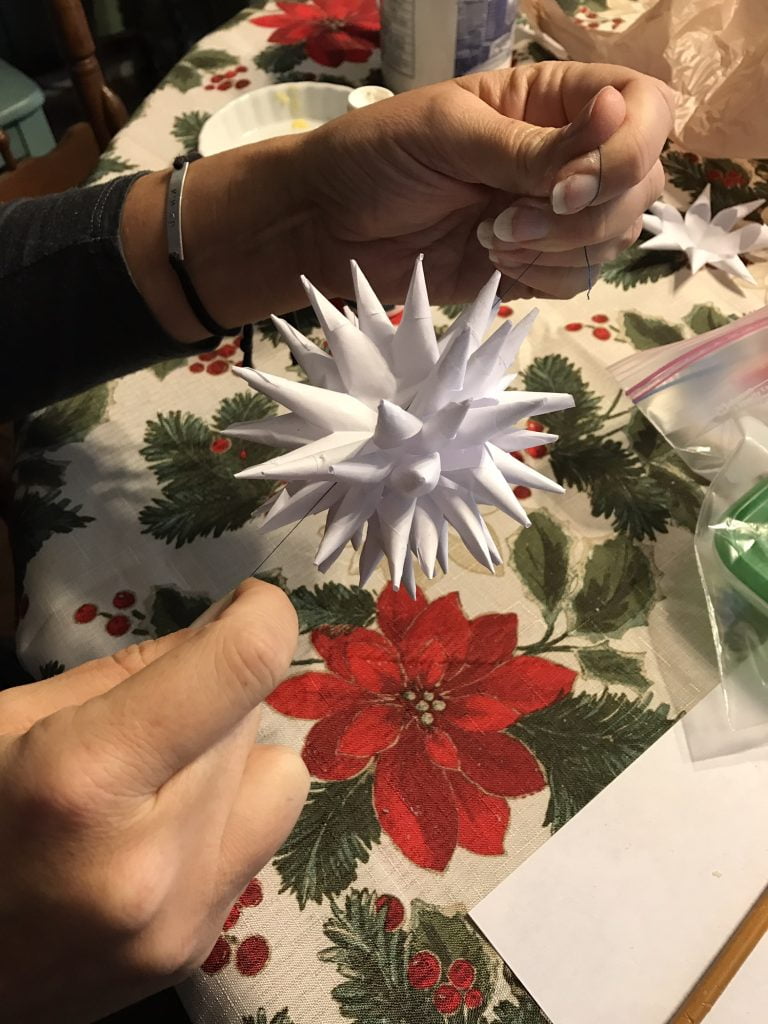
Cut the thread or yarn off at your desired length and tie at the end to make a hanger. Voila! A beautiful Polish star. If you got this far with me, you’re a star too!
Superstars can take this craft a step further by dipping the individual stars in glue and glitter before the last step of stringing them together. A lazier path to the same effect is to use stiff, shiny wrapping paper to make your stars rather than copy paper. They look really cool in patterned paper (which also hides errors).
Good luck! It’s actually really fun and is entertaining to do with kids or crafty friends. As I said, though, it’s a pretty forgiving project and looks cool even if you can’t cut a circle properly. As with many things, a mug of hot wine or a hot whiskey will make it turn out better.
Come on an adventure with us!
As tour guides for over 20 years, we combat mass tourism with longer stays, unique destinations, and cultural connections. Our small groups of 6-18 ensure personalized experiences. We value positive, flexible travelers who embrace challenges so if you love wine, fun, and new friends, why not join us for an adventure?


Love this! Thank you Sarah.
I love the Advent calendar and you for doing this for us, your readers and travel lovers. You are such a sweetie! Have a wonderful Christmas.Judith
What a beautiful star! Thanks for the tutorial. I now look forward to seeing what country we’ll visit next.
My kids & I are loving this advent calendar! As a person with a strong Polish heritage, we celebrate a typical Polish Xmas Eve every year: no meat allowed! Pierogi, nalesnieki, white fish, etc. And we start the meal by breaking oplatki (blessed holy wafer) & sharing with everyone present to ensure good wishes for the new year. Also, you must have an odd number of food on your plate for good luck. Quirky but fun traditions!
Your advent calendar is providing such a treat each day. Thank you for taking the time to do this!
Thanks for the instructions (and video) of the star. I am definitely going to try this. I miss all my craft days!(Remember that tonight (December 5) is when we put out our stockings for St. Nicholas. I love this European tradition!)